


Silhouette Mint Planner Stamps
Happy New Year Friends !
I am so excited about 2016 ! I am now a Silhouette maker which means I’m going to be bringing you Silhouette goodness all year-long ! OMGEEE how exciting right ?!? I am so honored for the amazing opportunity !!
I am normally a pretty organized person and I love to have multiple planners for different things. Such as, I have a planner for my personal stuff and my family and one for party styling and blogging. You don’t have to have multiple planners. It just works better for me to have different systems set up. I have a post for you later where I will talk about my planner essentials that I must have for effective planning.
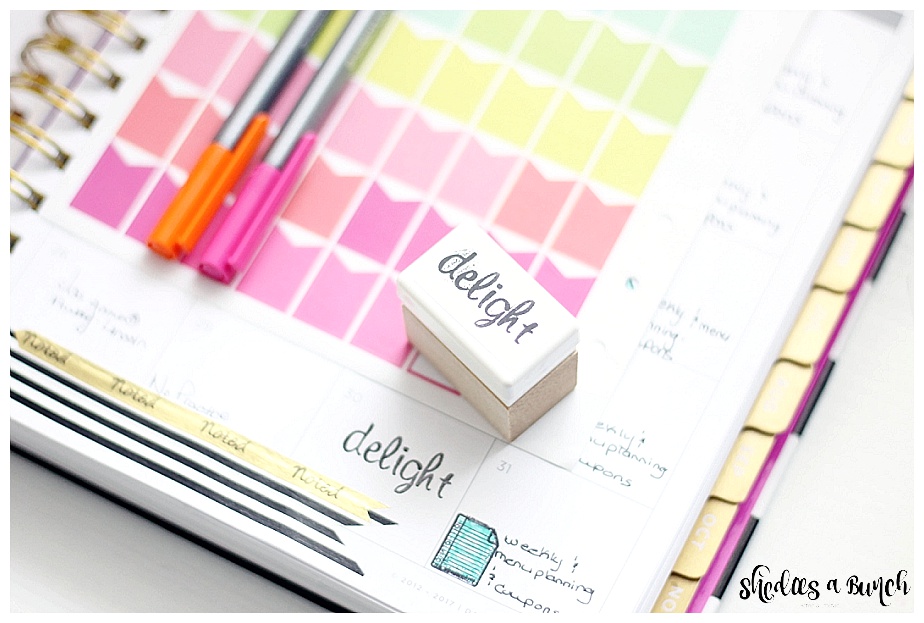
One of those essential items I must have is planner stamps. I have quite a few in my collection, but there is nothing like being able to make your own ! I have made planner stamps with my Silhouette Mint.

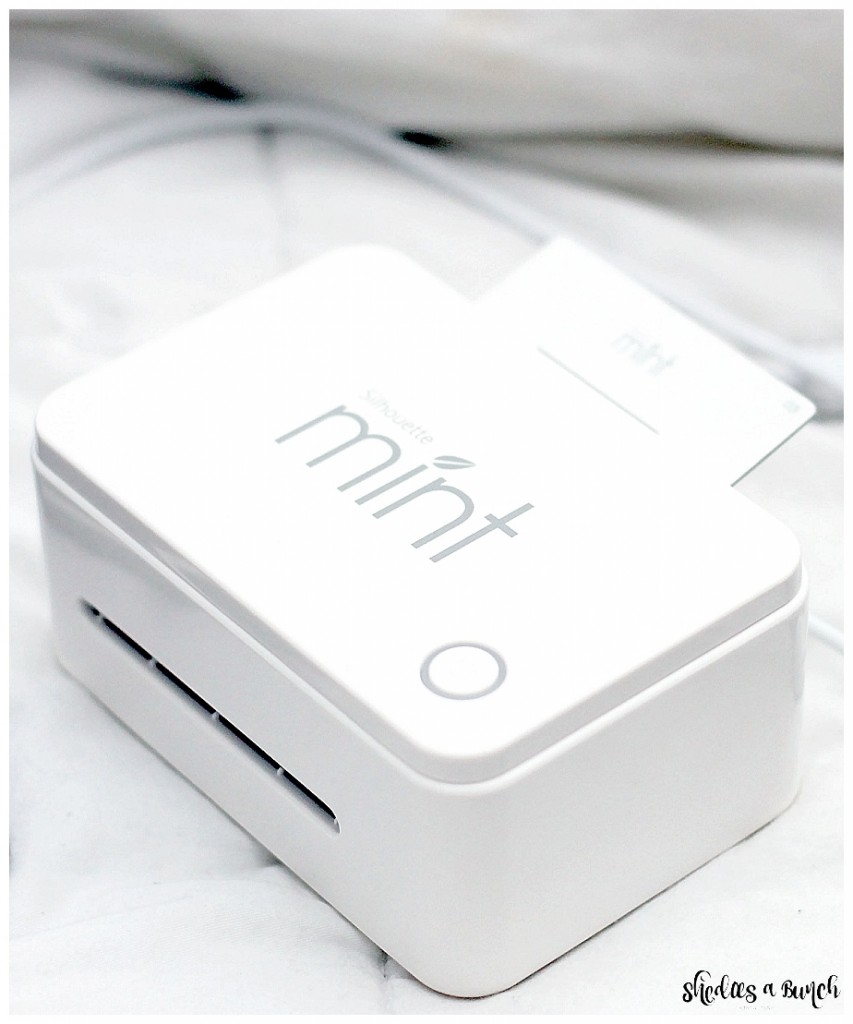
Have you hear of the Mint by Silhouette ? You should have because I talked about it a little here ! If not, then I strongly suggest you get hip !!
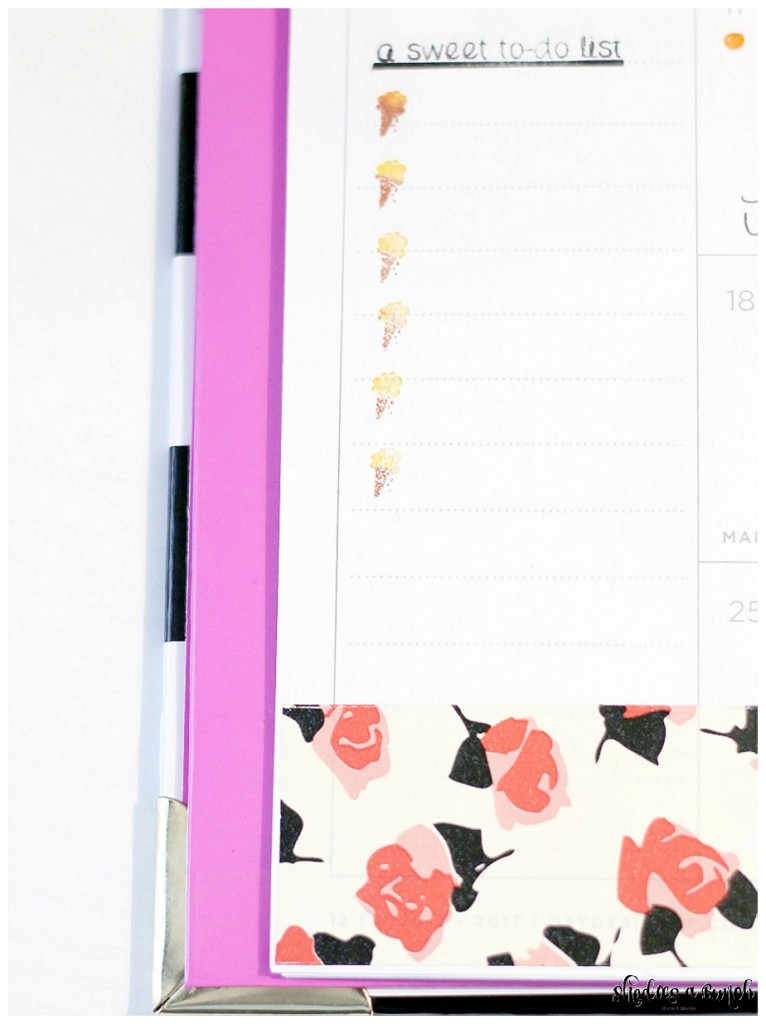
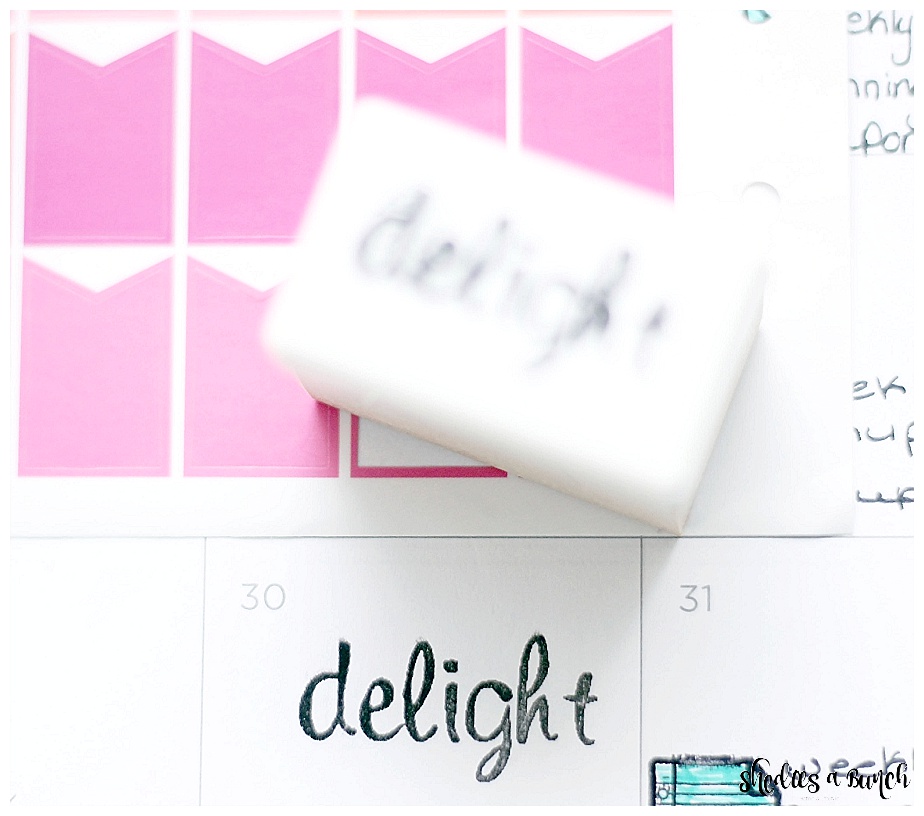
I don’t really do New Years resolution’s because they just don’t work for me and I don’t follow through with them. However, I am a big fan of setting goals, making list and using my One Little Word to carry me throughout the year. I wanted to be able to see the word in my planner everyday as a reminder, So I made a stamp. Here is the process to show you how I created my stamp and how you can make your own.
[line]
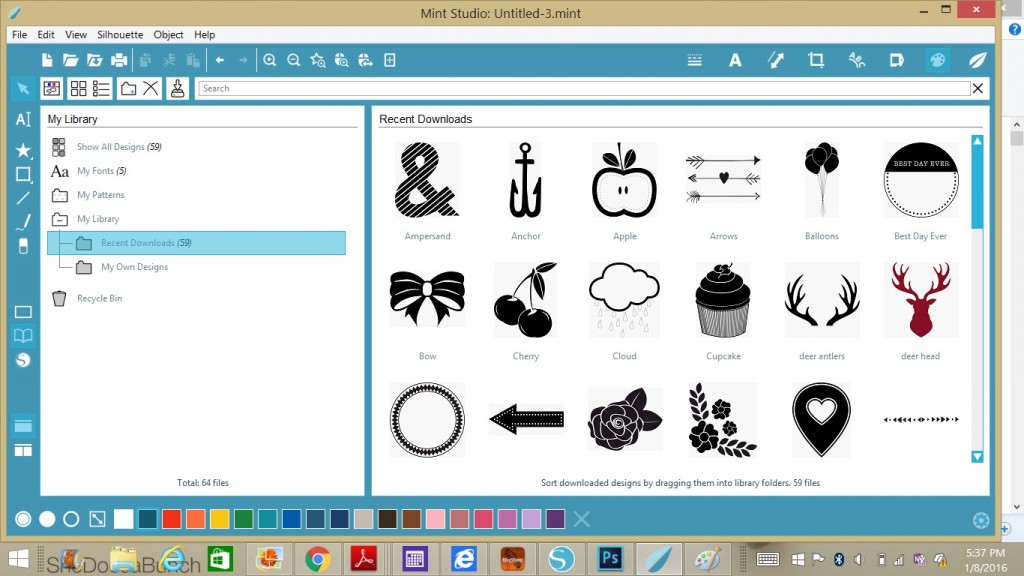
Start by opening a new file and then open the library with all your designs in them.
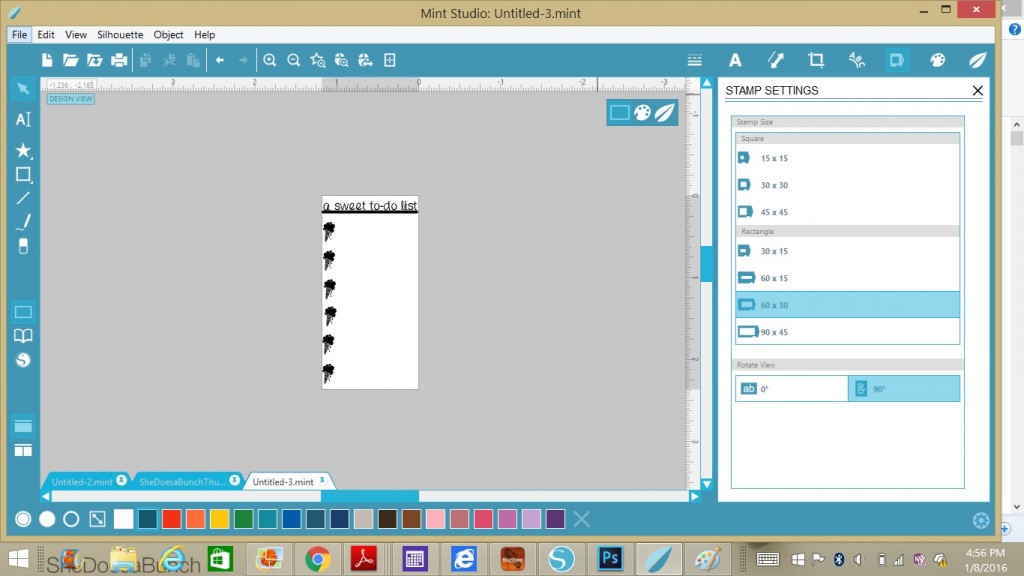
Once you have your design picked out, you then choose the size of your stamp and begin to design it !
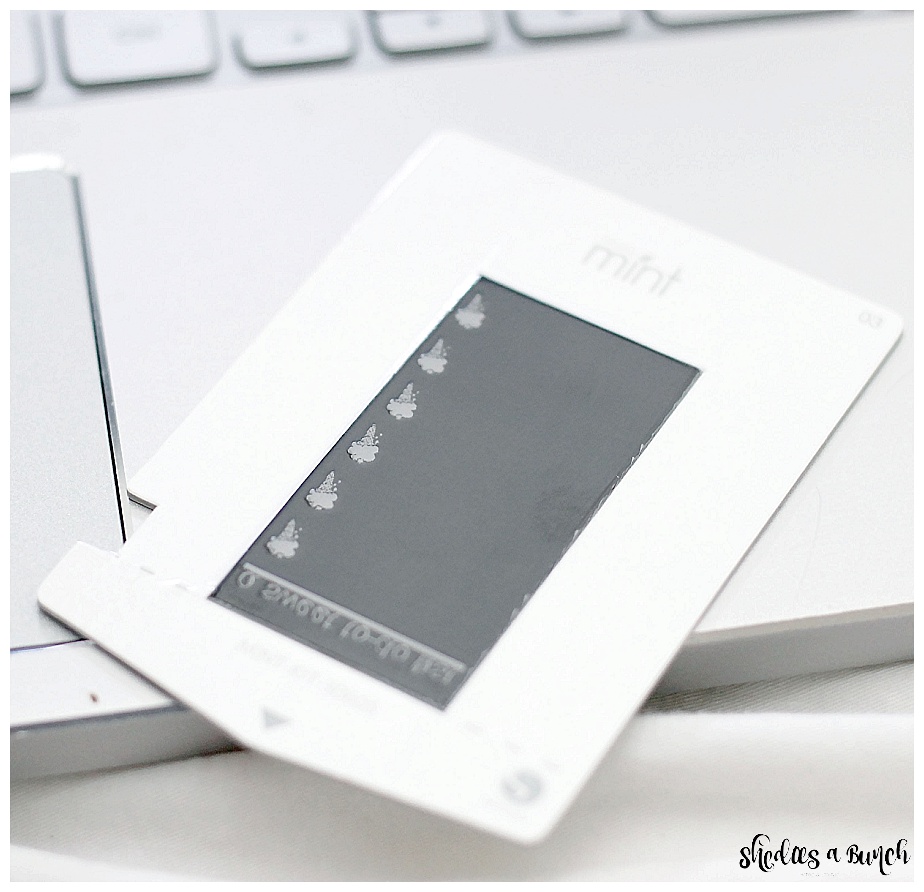
Once you have your Mint plugged in and connected to your computer, you are free to hit the start button.
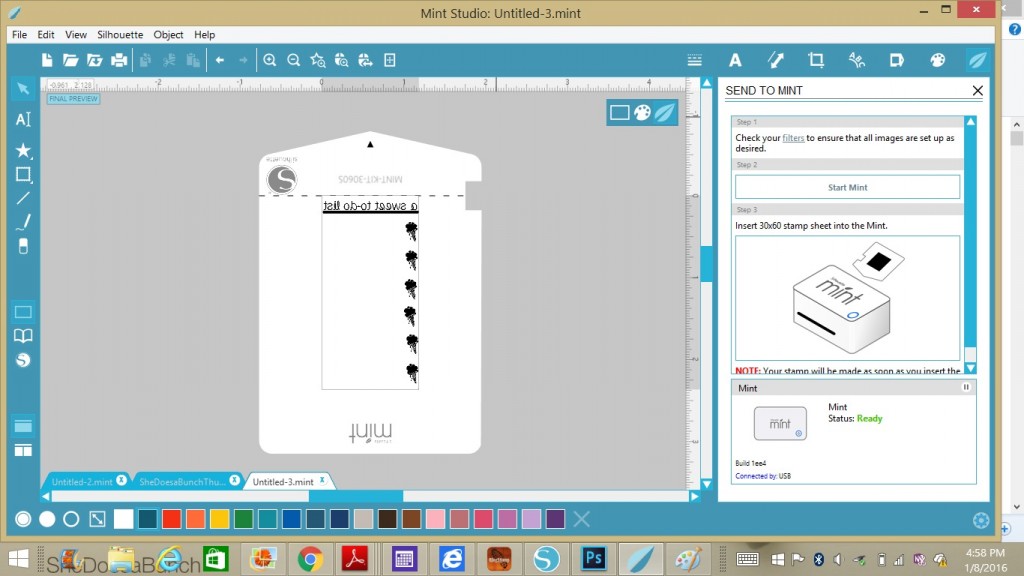
Be sure to insert the stamp sheet the way you see it on the screen shot above. You can see that image below too.
You then tear the cardboard at the perforated edge, pull all the plastic from the sheet and lift out the stamp piece from the cardboard. Then you take the stamp piece and the sticky side will adhere to the stamping block.
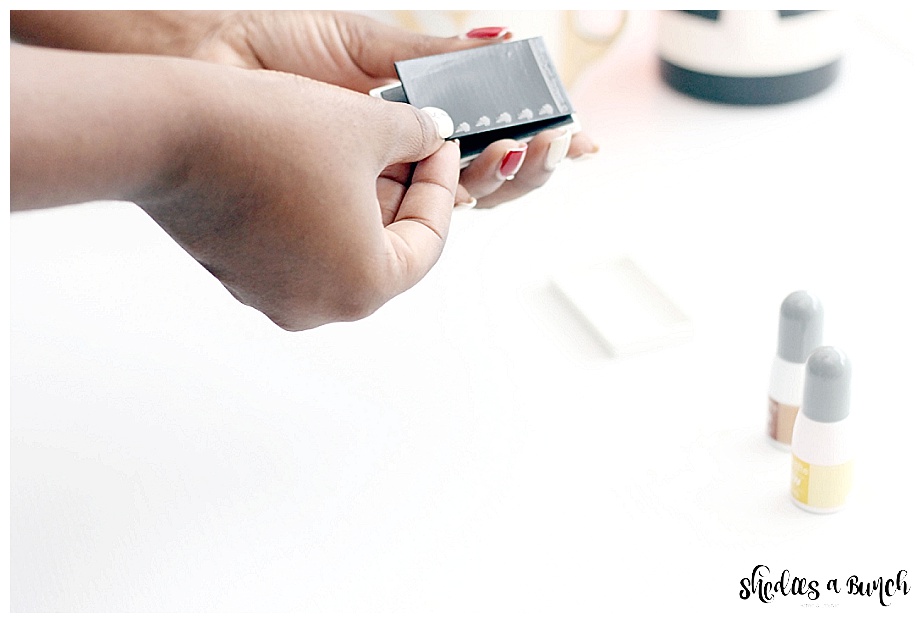
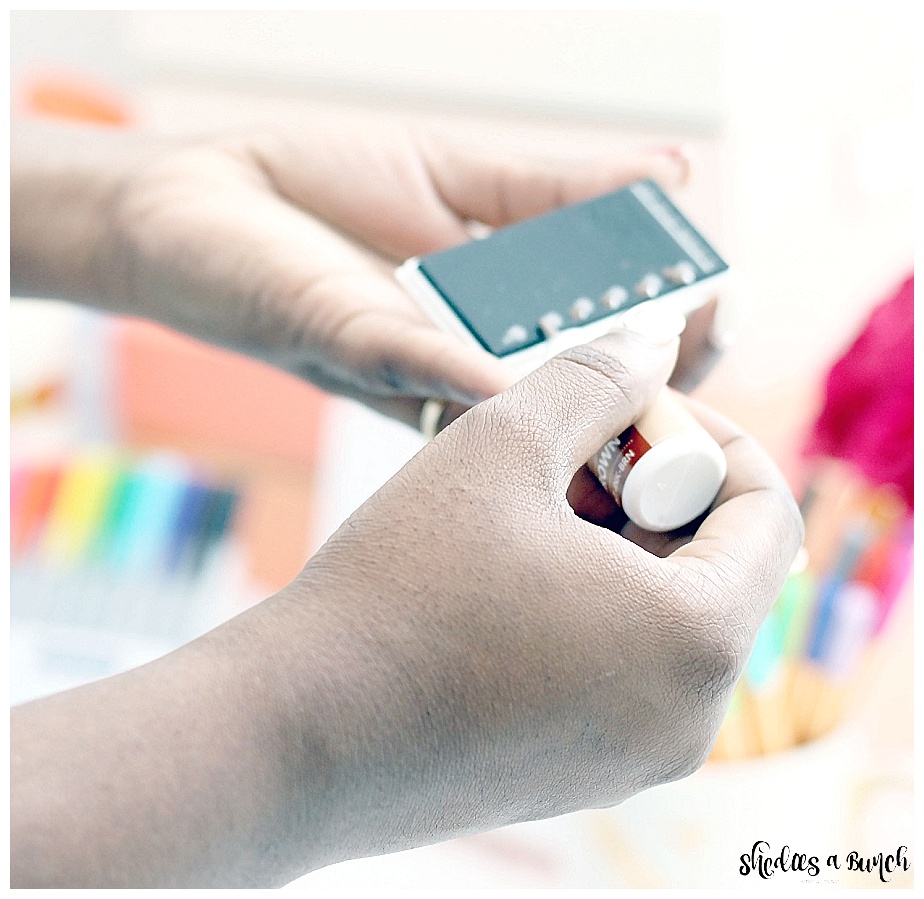
Use your Mint inks to place the color on your stamp that you would like. Don’t worry about the ink not being perfect on the stamp. This is my favorite part ! The stamp literally soaks up the ink. It’s so neat !
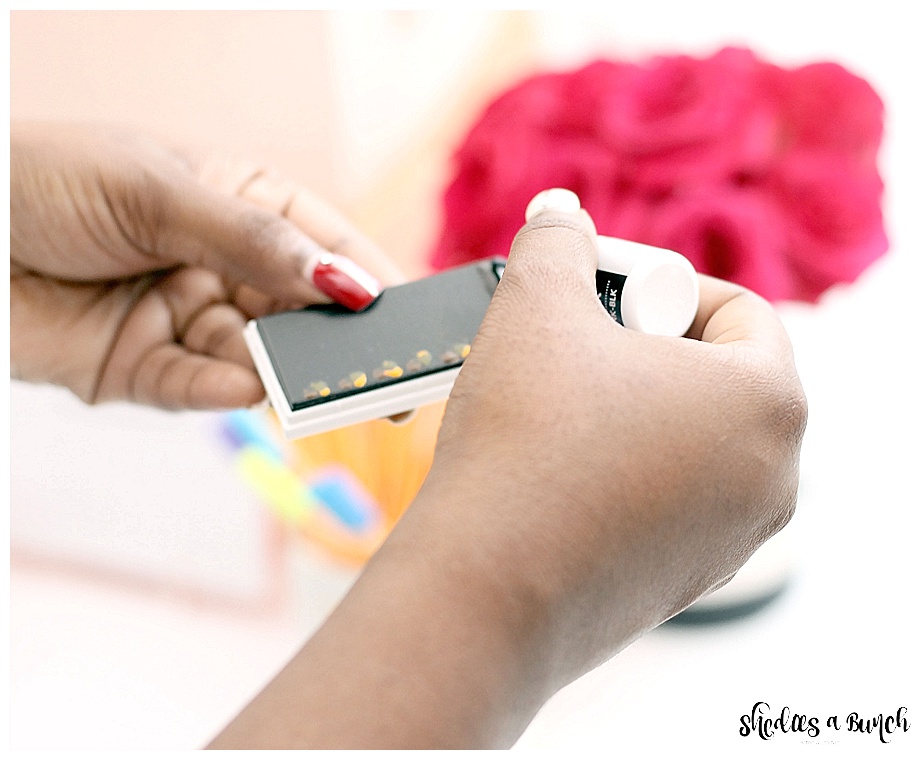
SEE !!!!
Once you allow the ink to set in the stamp, stamp on a sheet if paper a few times to get rid of any excess ink. Then you can stamp whatever you like up to 40-50 times before you have to re-ink the stamp !
The sky is truly the limit with what you can place on these stamps ! It beats having to go to the craft store and look for what you want, when you can just make it !
I hope you enjoyed this little tutorial !! Stay tuned for more Silhouette projects !
Nicole
January 8, 2016
7 COMMENTS
Leave a Reply
share your thoughts


Too cool and super fancy! Love it!! ????
Thank you so much friend !! ????????
I’ve been eyeing one of these and haven’t pulled the trigger but I think my planner needs one for sure. I’ll just add it to my sticker maker and laminator!!
Mimi ! Go ahead and get one, I promise you won’t regret it !!
Thank you for your information. As a planner person, can you put more than one image on a larger stamp to use for your planner? I want to use a few at a time but I do not think it is possible without having all images stamped at once. Can you help me clarify?
Thank you Deb ! You can put more than one image on a stamp. They have larger stamp blocks as well. I hope that answered your question.
[…] One I found the designs that I wanted needed, i simply sat down and let my Silhouette Cameo do the work! I have a few other projects on my blog that I have used to make all the things. One of the most popular are my planner stamps I used making the Silhouette Mint. You can find that post here […]